Greetings!
If you love circles scattered on a card as much as I do, then you'll love this card! 😆 I'm sure there's some psychology to it, but I know they simply make me smile. Maybe it's because there aren't any hard edges to them, so whether you tuck them under or overlap them with the edges of other circles, it feels like a fluid transition. Whatever the reason, it's an easy way to add color and layers for a background, and perfect for a simple image and sentiment.
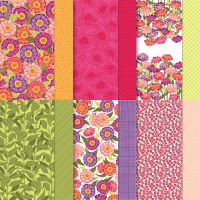
The Flowering Zinnias Designer Series Papers (DSP) have so many colors in them which made it an easy choice for the background panel behind the circles. It also made it very easy to pull colors from for the circles, all of which are a different size. The Stylish Shapes dies have circles in 6 sizes, and I used the largest 5 for this card.

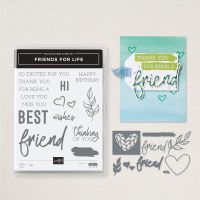
Wow, that's a lot of color, isn't it! I love how the dark shades of Blackberry Bliss and Mossy Meadow seem like the shadowed shades of the brighter circles and leaf. It creates a lot of depth. The "Happy Birthday" stamp from the Friends for Life stamp set is made with the two words stacked, but I wanted a long thin strip for this card. The beauty of a Photopolymer stamp is because it's clear, it's easy to see exactly what you're inking, making it easy enough to stamp one word at a time and position them side by side. You just need to make sure and clean and dry the stamp in between stamping the second word, so you don't have any leftover ink showing from the first word.
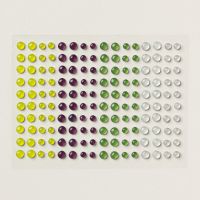
Lastly, this card gave me the opportunity to use the Transparent adhesive-backed Dots for the embellishment. I love the color assortment of this sheet of dots, and haven't had the right color combo to use them with yet. It's the little things, right! Since they were the right colors to use, I kept adding another one or two, just because I could. 😂
Whether you use circle dies, or have circle punches of various sizes, this is an easy template to use again and again. Mix up the colors and sizes for what works for you, and have fun experimenting. That's what creativity is all about...finding what feels right for you.
This month is BONUS DAYS. For every $50 you order in the month of July, you'll receive a $5 coupon code to use towards your purchase in August. The Flowering Zinnias paper used in today's card is just one of the many online exclusives, so you won't find them in a catalog. There are a wonderful variety of new online exclusives which were added this month, many taking you into the fall/winter holiday season, so make sure and check them out. If you're new to shopping the online exclusives, take time click onto a stamp set or die, and scroll through the pictures. There are samples included with each item, and they are gorgeous and certain to help you see ways to use them.
Gather Your Supplies:
- Friends For Life Bundle (Save 10% when you purchase stamp set & die with bundle item#)
- Stylish Shapes dies
- Basic White Thick cardstock
- card base 5-1/2 x 8-1/2 scored & folded at 4-1/4
- Mossy Meadow cardstock
- Blackberry Bliss cardstock
- Lemon Lolly cardstock
- Berry Burst cardstock
- Flirty Flamingo cardstock
- Lemon Lime Twist cardstock
- 4-1/4 x 2 with adhesive sheet
- Basic White cardstock
- Flowering Zinnias Designer Series Paper
- 3-3/4 x 5-1/2 field of zinnias print
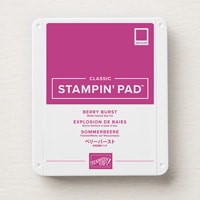
- Berry Burst Classic Stampin' Pad
- Transparent adhesive-backed Dots
- Adhesive Sheets
- Stampin' Cut & Emboss Machine
=============================================================
Product List
=============================================================
Here's How It's Made:
Adhere DSP print panel to Basic White Thick folded card front. Position die cut circles onto print, overlapping colors to fit onto DSP panel, adhere.
Die cut Lemon Lime Twist cardstock (with adhesive sheet attached) using large leafy die. Adhere over Mossy Meadow, Lemon Lolly and Flirty Flamingo circles. I opted to fill some of the openings in the leaves with the cut out pieces.
Ink "Happy", stamp onto Basic White cardstock strip. Clean and dry stamp completely, ink "Birthday", stamp to right of "Happy" on cardstock strip. Adhere across lower part of leaf on card front with Stampin' Dimensionals.
Embellish with Transparent Dots.
=============================================================
Essential Tools:
These are the tools I recommend for a positive experience with all of your paper crafting projects. Having the right tools makes every project go more smoothly from start to finish.
=============================================================
=============================================================
If you've ever thought it would be fun to get great products at a discount, inspire others, be part of a crafting community and more, I encourage you to check out the benefits of being a Stampin' Up Demonstrator. Whether you want it as a hobby, a chance to have an easy store at your fingertips for you and your friends, or want to build a business, the decision is yours. Click on the button below to find out more.
I am a member of Dawn Olchefskes' DOStampers STARS community, so when you join my team, you are also part of this fabulous community where we share inspiration, creativity, support and education!
=============================================================
=============================================================
- Place an online order of $75 or more (before tax/shipping) and earn a FREE Gift (FREE Gift sent by August 15th)
- For orders of $150 or more in my store (before tax/shipping), do not apply the Host Code. Use the Stampin' Rewards you will earn. You will receive the Host code gift from me.
- One Host code gift per customer, per month.
=============================================================
Thank you so much for stopping by! I hope you're inspired to gather your supplies and get creative!
Have a beautiful day! 😊
Beverly J







No comments:
Post a Comment