Greetings!
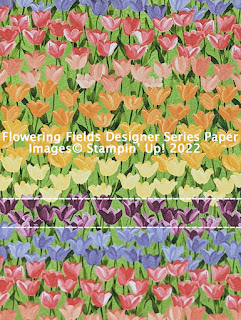
This past week I participated in a Sample Square Swap. This is a swap where instead of making a full card, you simply make a small square, preferably sans text, that measures 2" square, then matted so the finished product is 2-1/4" square. A minimum of 9 people need to participate so each participant ends up with 9 different squares. These can then be arranged into a 8" square picture frame displayed as a sampler. For this swap, the requirements were to use only the colors featured in the Flowering Fields Designer Series Paper (DSP) as well as only prints from this collection.
I love the way my square turned out, so I made a few extras. I decided it would be gorgeous as a focal point on a card and here's what I ended up with.
This card was completed in no time! Having the tulip image colored, matted and ready to go on a card made this so easy and I realized this is a great way to have things ready to put together. Make up a few of an image you love, matte it in colors that work well coordinating papers, and it's ready to assemble onto your card base with whatever features and message you want to add. Such a great idea!
Gather Your Supplies:
- Flowering Tulips stamp set
- Pear Pizzazz cardstock
- card base 4-1/4 x 11 scored & folded at 5-1/2 OR 5-1/2 x 8-1/2 scored & folded at 4-1/4
- Basic White cardstock
- 5-1/4 x 4 panel
- 1-3/4 x 1-3/4
- Rich Razzleberry cardstock
- 2 x 2
- Fresh Freesia cardstock
- 2-1/4 x 2-1/4
- Flowering Fields Designer Series Paper
- 5-1/4 x 1/2
- 5-1/4 x 1-1/4
- Rich Razzleberry Classic Stampin' Pad
- Fresh Freesia Classic Stampin' Pad
- Pear Pizzazz Classic Stampin' Pad
- Wink of Stella© Clear Glitter Brush
- Artistry Blooms adhesive-backed sequins
- On the Horizon stamp set
- Place an online order of $65 or more (before tax/shipping) and earn a FREE Gift (FREE Gift sent by April 15th)
- For orders of $150 or more in my store (before tax/shipping), do not apply the Host Code. Use the Stampin' Rewards you will earn. You will receive the Host code gift from me.
- One Host code gift per customer, per month.
Thank you so much for stopping by! I hope you're inspired to gather your supplies and get creative!


No comments:
Post a Comment