Greetings!
Making cards takes me to my happy place. Rarely do I make a card because I need it right then and there. I make cards because I love the process of designing and creating. More often than not I start with an idea of a die I want to use, a particular image I want to stamp or a new set that I haven't played with yet.
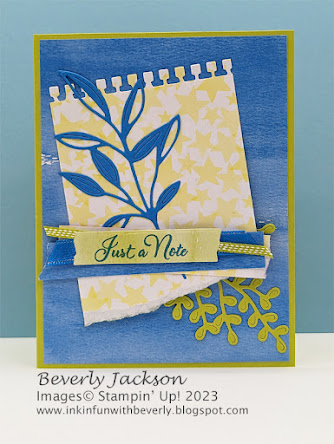
Today's card started with the open leaf die cut image. I had cut it out a few days ago but never used it and I have a hard time not using what I've already cut out. Since it is part of the Gorgeously Made dies I wanted to continue to incorporate more pieces from that die set. I try and keep my cards to using a minimal amount of dies and stamp sets or bundles so that my inspiration doesn't cost someone a fortune if they want to recreate what I've made.
Since my die cut image was in Azure Afternoon, a beautifully bright blue, I wanted to grab some papers and prints that would work well with it. As I flipped through the Bright & Beautiful Designer Series Papers (DSP) I knew the prints were the perfect fit.
The Gorgeously Made dies provided all the elements die cut on this card. I don't know what it is, but I am such a sucker for the spiral bound edge on paper, so I had to use it for the top of the "note page", and I carried it through and used the other piece on the inside.
A quick note is the perfect thing to send anytime and the Go To Greetings stamp set has greetings in multiple fonts and sizes so you can choose the one that's just right for your card.
Now I have a card ready, so when someone pops into my head that I want to send a card to, I simply go to my inventory, grab a card appropriate for the occasion, add a note and it's ready to send.
Having a supply of handmade cards is like having your own store at your fingertips. Keep them sorted by category, so it's easy to pull one without having to flip through everything. Make sure you have the envelopes on hand too so you have everything you need.
Gather Your Supplies:
- Gorgeously Made dies
- Go To Greetings stamp set
- Lemon Lime Twist cardstock
- card base 4-1/4 x 11 scored & folded at 5-1/2 OR 5-1/2 x 8-1/2 scored & folded at 4-1/4
- 4-1/4 x 3
- Azure Afternoon cardstock
- Basic White cardstock
- Bright & Beautiful Designer Series Paper
- 6 x 4 Azure Afternoon watercolor wash print, cut to 5-1/4 x 4 and 3/4 x 4
- 6 x 3 Lemon Lolly stars on white print, cut to 5-1/4 x 3 and 3/4 x 3
- 6 x 3/4 Lemon Lime Twist watercolor wash print
- Azure Afternoon Classic Stampin' Pad
- Azure Afternoon 3/8" Sheer Ribbon - 4"
- Lemon Lime Twist 1/8" Ribbon - 4"
=============================================================
Product List =============================================================
Here's How It's Made:
Adhere Azure Afternoon watercolor wash DSP print to Lemon Lime Twist folded card front.
Position spiral bound die at a short edge of the Lemon Lolly stars on white DSP print, die cut. Tear off bottom edge approximately 4" from die cut edge. Save all pieces.
Die cut Azure Afternoon cardstock with open leaf die. Die cut Lemon Lime Twist cardstock with rounded leaf die.
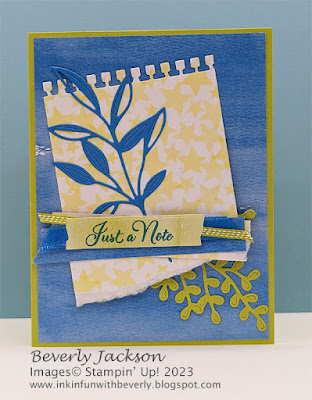
Adhere Lemon Lime Twist rounded leaf die cut near lower right corner of card front. Adhere notebook page die cut angled with top near upper left, and bottom overlapping rounded leaf die cut. Adhere Azure Afternoon open leaf die cut onto notebook page as shown.
Ink "Just a Note" with Azure Afternoon, stamp onto Lemon Lime Twist watercolor wash DSP print. Die cut with torn edge label die.
Adhere saved Azure Afternoon and star print DSP strips offset to one another, tear one edge of each to shorten. Adhere Azure Afternoon Sheer Ribbon and Lemon Lime Twist ribbon on top of DSP strips. Adhere assembled piece to lower front of card. Adhere Just a Note label with Stampin' Dimensionals to top of ribbons and DSP strips.
Here's what the inside looks like:
The left over pieces from the DSP prints were too cute to throw away, so I used them inside.
Adhere spiral notebook die cut edge to 3" edge of Basic White cardstock, adhere to inside of card. Adhere left over stars on white print at bottom edge of Basic White cardstock.
Adhere remaining piece of Lemon Lime Twist DSP print along edge to look like a piece of tape.
=============================================================
Essential Tools:
These are the tools I recommend for a positive experience with all of your paper crafting projects. Having the right tools makes every project go more smoothly from start to finish.
=============================================================
=============================================================
I LOVE being a Stampin' Up! Demonstrator for a variety of reasons! If you love stamping and sending cards, getting together with friends and being creative, want a way to reach out to your community, earn some money doing something you love, or any combination of these things, and more, now is a great time to join!
I am a member of Dawn Olchefske's DOStampers STARS community, so when you join my team, you are also part of this fabulous community where we share inspiration, creativity, support and education, as well as a whole new group of crafting friends!
=============================================================
- Place an online order of $65 or more (before tax/shipping) and earn a FREE Gift (FREE Gift sent by August 15th)
- For orders of $150 or more in my store (before tax/shipping), do not apply the Host Code. Use the Stampin' Rewards you will earn. You will receive the Host code gift from me.
- One Host code gift per customer, per month.
=============================================================
Thank you so much for stopping by! I hope you're inspired to gather your supplies and get creative!
Have a beautiful day! 😊
Beverly J


No comments:
Post a Comment